

Picking up where I left off on Monday -- I wasn't totally satisfied with the "Almost Anonymous" sketch that I posted, earlier this week. So as I worked toward the final illustration, I decided to do some more sketching. I kept things very gestural, trying to nail a composition using as few lines as possible. And I finally hit the mark I was aiming for, with the doodle in the upper left corner of the above image. The feel of that simple figure sketch set off a blaze in my imagination. And that's what I was looking for.

From there, I dove straight into a graphite drawing of what would be the final image. I whipped this out quickly, pouring as much raw power as I could pack into the lines. One of my visual mainstays is energy... motion. So I'm very conscious of maintaining that, through each step of a piece.
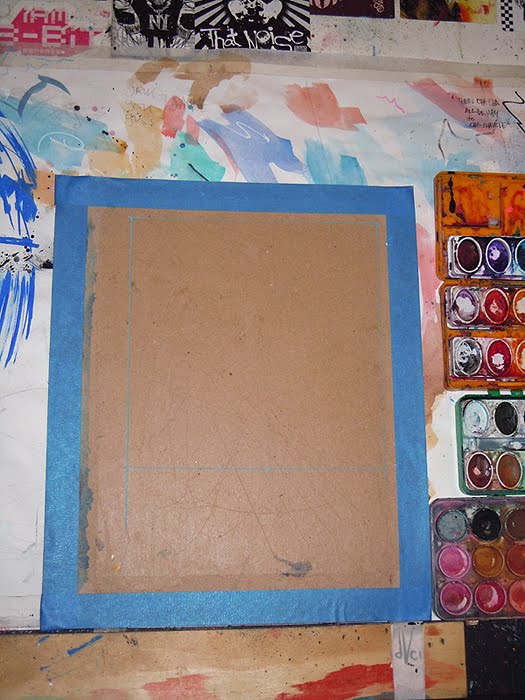

This gangsta-ass economy being what it is, there's no shame in recycling materials. Even a scrap piece of cardboard from an old sketchbook can make a worthy canvas. All you need is masking tape, gesso & some pixie dust!

Using scrap board can be a gambit. For instance, when I gessoed the front of this sheet of cardboard, it warped like a bad acid trip. So I flipped it over and gessoed that back, as well. This is a surefire trick for flattening out a warped board. Plus, having a coat of gesso on each side of the cardboard helps make it sturdier in the long run. Boosh!


Since I was so happy with the rough drawing I produced, I decided not to waste time redrawing the whole thing from scratch. Instead, I cut out the most important parts of the sketch (the figures) and collaged them right onto my gessoed board. Normally, I'd use an acrylic medium as a glue. But I'm fresh out of mediums, so I went with my trusty gesso. I applied an even coat where needed. Then I carefully affixed the drawing, making sure to eliminate any nasty air pockets beneath the paper.


Because I used the original sketch for the collage, the loose graphite combined with the gesso to create a pale gray tone. As sloppy as it may look, I could clearly see the important elements of my sketch. And with some colored pencils I stole from a kindergartner, I went in and started enhancing said elements -- solidifying some lines, adjusting others -- until it came out just the way I wanted it.

Next thing I knew, I had a completed drawing, just waiting for me to get all painty with it!
I know this may seem like a lot of extra steps, but I'm a sucker for process. A lot of the classical painters & illustrators whose work I enjoy would create meticulous "rough" drawings and paintings, before finally tackling their finished works. And while it contrasts the impatient pace of modern life, I still feel like those early steps leading up to a finished illustration are essential. That is, when the vast chasm of a deadline isn't two steps in front of me.
Stay tuned for the competed painting, this Friday!
"You can crush us. You can bruise us. But you'll have to answer to, ooo-oh, The Guns of Brixton."
- Dave
Great post, thanks for the breakdown!
ReplyDeleteLove it! Great post on the process!
ReplyDeletep.s.
Is that a CCAD ruler on the mat? I have one just like it I got there in '93!
Haha! Thanks guys. And indeed, it IS a CCAD ruler. I was hoping another alumni would notice that :)
ReplyDelete